Home
Databases

Access 2010 is a database creation and management program. To understand Access, you must first understand databases.
In this lesson, you will learn about databases and how they are used. You will familiarize yourself with the differences between data management in Access and Microsoft Excel. Finally, you will get a look ahead at the rest of the Access course.
What is a Database?
A database is a collection of data that is stored in a computer system. Databases allow their users to enter, access, and analyze their data quickly and easily. They’re such a useful tool that you see them all the time. Ever waited while a doctor’s receptionist entered your personal information into a computer, or watched a store employee use a computer to see whether an item was in stock? Then you’ve seen a database in action.
The easiest way to understand a database is to think of it as a collection of lists. Think about one of the databases we mentioned above-- the database of patient information at a doctor’s office. What lists are contained in a database like that? Well, to start with, there’s a list of the customer names. Then, there’s a list of past appointments, a list with medical history for each patient, a list of contact information... and so on, and so on.
This is true of all databases, from the simplest to the most complex. For instance, if you like to bake, you might decide to keep a database containing the types of cookies you know how to make and the friends you give those cookies to. This is one of the simplest databases imaginable. It contains two lists: a list of your friends, and a list of cookies.

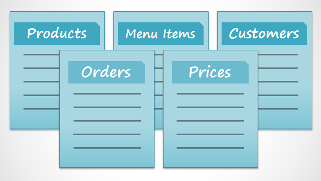
However, if you were a professional baker, you would have many more lists to keep track of: a list of customers, a list of products sold, a list of prices, a list of orders... it goes on and on. The more lists you add, the more complex the database will be.
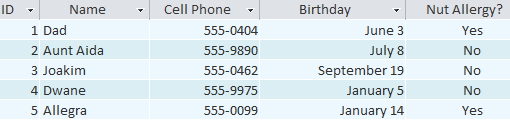
In Access, lists are a little more complex than the ones you write on paper. Access stores its lists of data in tables, which allow you to store even more detailed information. In the table below, the “People” list in the amateur baker’s database has been expanded to include other relevant information about the baker’s friends.
Why Use a Database?
If a database is essentially a collection of lists stored in tables, and you can build tables in Excel, why do you need a real database in the first place? While Excel is great at storing and organizing numbers, Access is far stronger at handling non-numerical data, like names and descriptions. Non-numerical data plays a big role in almost any database, and it's important to be able to sort and analyze it.
However, the thing that really sets databases apart from any other way of storing data is connectivity. We call a database like the ones you’ll work with in Access a relational database. A relational database is able to understand how lists and the objects within them relate to one another. To explore this idea, let's go back to the simple database with two lists: names of your friends, and the types of cookies you know how to make. You decide to create a third list to keep track of the batches of cookies you make and who they’re for. Since you're only making cookies you know the recipe for, and you're only going to give them to your friends, this new list will get all its information from the lists you made earlier.

See how the third list uses words that appeared in the first two lists? A database is capable of understanding that the "Dad" and "Oatmeal" cookies in the "Batches" list are the same things as the "Dad" and "Oatmeal" in the first two lists. This relationship seems obvious, and a person would understand it right away. However, an Excel workbook wouldn’t.
Excel would treat all of those things as distinct and unrelated pieces of information. In Excel, you'd have to enter every single piece of information about a person or type of cookie all over again each time you mentioned it, because that database wouldn't be relational like an Access database is. Simply put, relational databases can recognize what a human can: that if the same words appear in multiple lists, they refer to the same thing.
The fact that relational databases can handle information this way allows you to enter, search, and analyze data in more than one table at a time. All of these things would be very difficult to do in Excel, but in Access, even complicated tasks can be simplified and made fairly user-friendly.
The Access Objects
Tables, queries, forms, and reports are the framework for any database you create in Access. Understanding how each of these objects works will help you create a database that will be useful and will help you retrieve the information you need.
Tables
By this point, you should already understand that a database is a collection of data organized into many connected lists. In Access, all data is stored in tables, which puts tables at the heart of any database.
You might already know that tables are organized into vertical columns and horizontal rows.

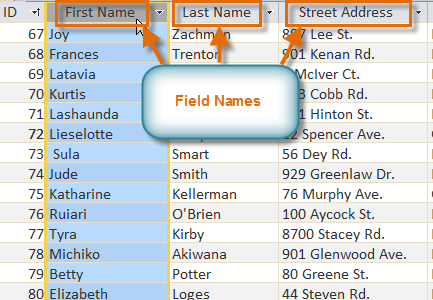
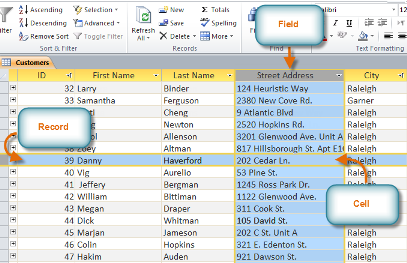
In Access, rows and columns are referred to as Records and Fields. A field is more than just a column: it’s a way of organizing information by the type of data it is. Every piece of information within a field is of the same type. For example, every entry in a field called “First Name” would be a name, and every entry in field called “Street Address” would be an address.
Likewise, a record is more than just a row; it’s a unit of information. Every cell in a given row is part of that row’s record.
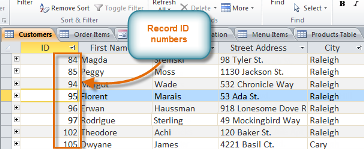
Notice how each record spans several fields. Even though the information in each record is organized into fields, it belongs with the other information in that record. See the number at the left of each row? That’s the ID number that identifies each record. The ID number for a record refers to every piece of information contained on that row.
Tables are good for storing closely related information. Say that you own a bakery and have a database that includes a table with your customers' names and information like their phone numbers, home addresses, and email addresses. Since these pieces of information are all details about your customers, you’d include them all in the same table. Each customer would be represented by a unique record, and each type of information about those customers would be stored in its own field. If you decided to add any more information — say, the customer's birthday — you would simply create a new field within the same table.
Although tables store all of your data, the other three objects offer you ways to work with it. They are: forms, queries, and reports. Each of these objects interacts with the records stored in your database's tables.
Forms are used for entering, modifying, and viewing records. You have probably had to fill out forms on many occasions, like when visiting a doctor's office, applying for a job, or registering for school. The reason forms are used so often is that they're an easy way to guide people into entering data correctly. When you enter information into a form in Access, that data goes exactly where the database designer wants it to go — in one or more related tables.
Forms make entering data easier. Working with extensive tables can be confusing, and when you have connected tables, you might need to work with more than one at once to enter a set of data. However, with forms, it's possible to enter data into multiple tables at once, all in one place. Database designers can even set restrictions on individual form components to ensure that all of the needed data is entered in the correct format. All in all, forms help keep data consistent and well-organized, which is essential for an accurate and powerful database.
Queries are a way of searching for and compiling data from one or more tables. Running a query is like asking a detailed question of your database. When you build a query in Access, you are defining specific search conditions to find exactly the data you want.
Queries are far more powerful than the simple searches you might carry out within a table. While a search would be able to help you find the name of one customer at your business, you could run a query to find the name and phone number of every customer who's made a purchase within the past week. A well-designed query can give information that you might not be able to find out just by looking through the data in your tables.
Reports offer you the ability to present your data in print. If you've ever received a computer printout of a class schedule or a printed invoice of a purchase, you've seen a database report. Reports are useful, because they allow you to present components of your database in an easy-to-read format. You can even customize a report's appearance to make it visually appealing. Access offers you the ability to create a report from any table or query.
While there are four types of database objects in Access 2010, tables are arguably the most important. Even when you're using forms, queries, and reports, you're still working with tables, since that's where all your data is stored. Tables are at the heart of any database, so it's important to understand how to use them.
All tables are composed of horizontal rows and vertical columns, with small rectangles called cells in the places where rows and columns intersect. In Access, rows and columns are referred to as records and fields.
A field is a way of organizing information by type. Think of the field name as a question, and every cell within that field as a response to that question.

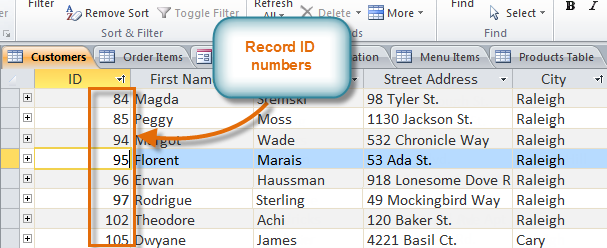
A record is one unit of information. Every cell on a given row is part of that row's record. Each record has its own ID number. Within a table, each ID number is unique to its record, and refers to all the information within that record. The ID number for a record cannot be changed.
Each cell of data in your table is part of both a field and a record. For instance, if you had a table of names and contact information, each person would be represented by a record, and each piece of information about them—their name, phone number, address, and so on—would be contained within a distinct field on that record's row.
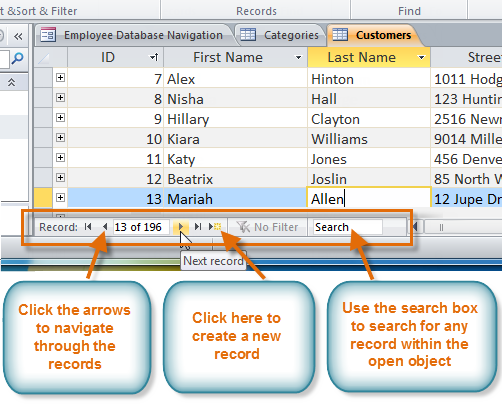
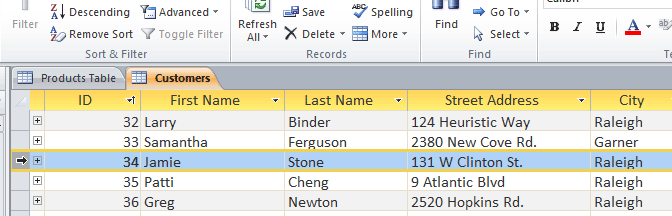
To navigate through records in a table, you can use the up and down arrow keys, scroll up and down, or use the arrows in the record navigation bar located at the bottom of your table. You can also find any record in the currently open table by searching for it using the record search box. Simply place your cursor in the search box, type any word that appears in the record you would like to find, and press the enter key. To view additional records that match your search, press enter again.
Entering data into tables in Access is very similar to entering data in Excel. To work with records, you'll have to enter data into cells. If you need help entering data into records, you might want to review our Excel 2010 Cell Basics lesson.
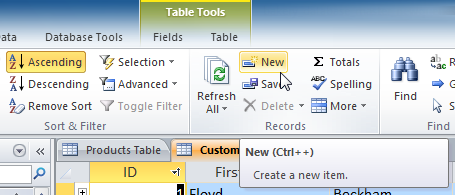
There are three ways to add a new record to a table:
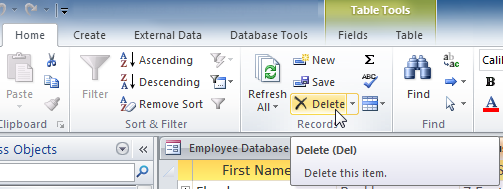
To quickly edit any record within a table, you can just click on it and type in your changes. However, Access also offers you the ability to find and replace a word within multiple records and to delete records entirely.
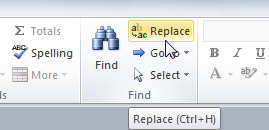
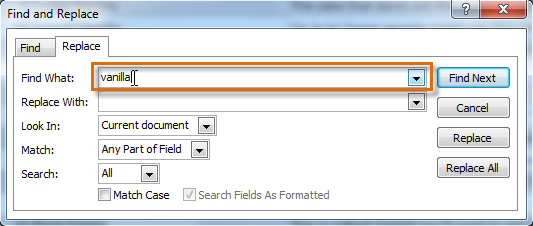
You can edit multiple occurrences of the same word by using Find and Replace, which searches for a term and replaces it with another term.
Click the Find What: box and type the word you would like to find.
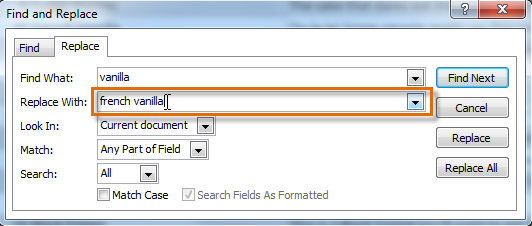
Click the Replace With: box and type the word you would like to replace the original word.
A primary key is a field (or group of fields) that uniquely identifies each record in a table. No two records in a given table can have the same value in their primary key field. An employee identification number is often used as a primary key in accounting systems because every employee must have one, and every one is unique.
Primary key fields serve a number of purposes. Because the primary key field uniquely identifies each record in the table, the primary key is used to create relationships between tables, allowing all the records in one table to be matched to the records in another. In the absence of a specific sort order, records in a table are sorted by the primary key field.
Access has an AutoNumber feature that assigns a unique number to each record as it’s created. AutoNumber fields are thus well suited for use as primary keys. It’s usually easiest and safest to let Access use the AutoNumber field as the primary key.
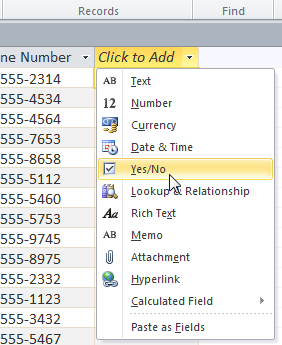
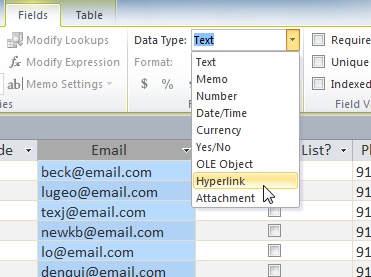
Select the desired data type.
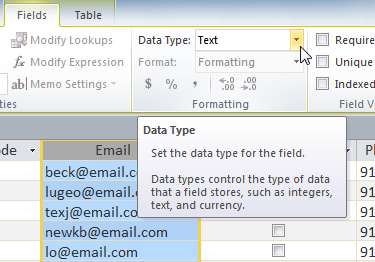
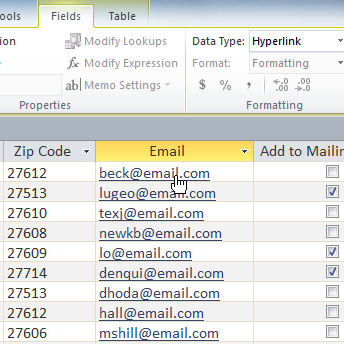
The field data type will be changed. Depending on the data type you chose, you may notice changes to your information. For instance, since we set the data type for the Email field to Hyperlink, all of the email addresses in the field are now clickable links.
You shouldn't change field data type unless you are certain your field data is in the correct format for the new data type. Changing a field containing only text to the Number type, for instance, will delete all of your field data. This process is often irreversible.
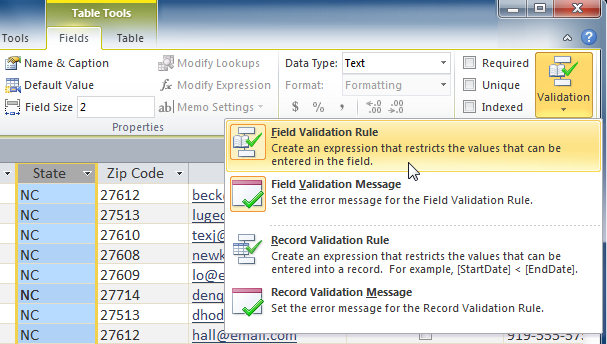
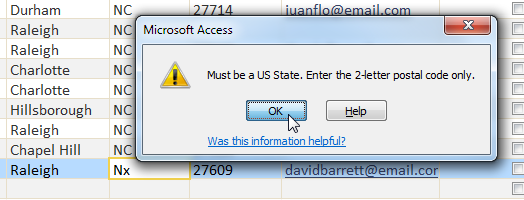
A validation rule is a rule that dictates what information can be entered into a field. When a validation rule is in place, it is impossible for a user to enter data that violates that rule. For example, if we were asking the user to input a state name into a table with contact information, we might create a rule which limits the valid responses to U.S. state postal codes. This would prevent users from typing something that wasn't actually a real state postal code.
In the example below, we will apply that rule to our Customers table. It's a fairly simple validation rule—we'll just name all of the valid responses a user could enter, which will mean the user can't type anything else into the record. However, it's possible to create validation rules that are much more complex. For detailed information on how to write validation rules, review this official Microsoft office tutorial on creating validation rules.
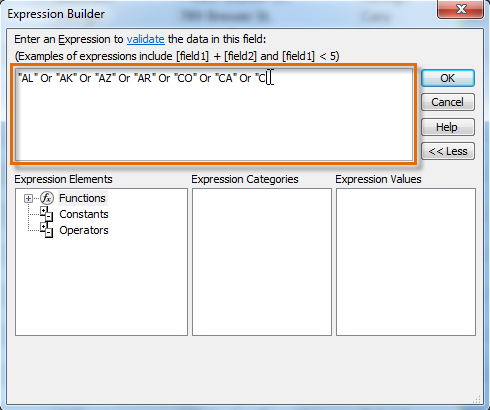
The Expression Builder dialog box will appear. Click the text box and type in your validation rule.
In our example, we want to limit data in the State field to actual state postal codes. We'll type each of the valid responses in quotation marks, and separate them with the word Or, which lets Access know that this field can accept the response "AL" or "AK" or "AZ" or any of the other terms we've entered.

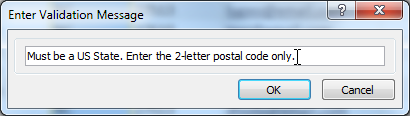
The Enter Validation Message dialog box will appear. Type the phrase you would like to appear in an error message when a user tries to enter data that violates the validation rule. Your message should let the user know what data is permitted.
Simple validation rules can be written exactly like query criteria. The only difference is that query criteria search for data, while an identical validation rule either permits or rejects data.
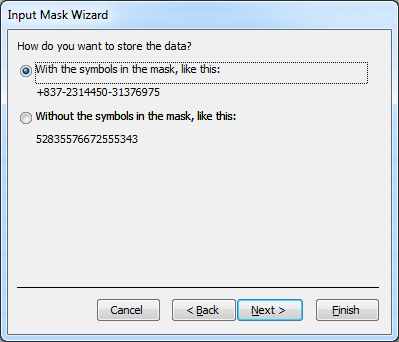
When you have several people entering data in your database, you can define how users must enter data in specific fields to help maintain consistency and to make your database easier to manage. For example, you can set an input mask for a form so that users can only enter telephone numbers in the Swedish format or addresses in the French format. You can set a specific format for the input mask, and select another format so that the same data is displayed differently.
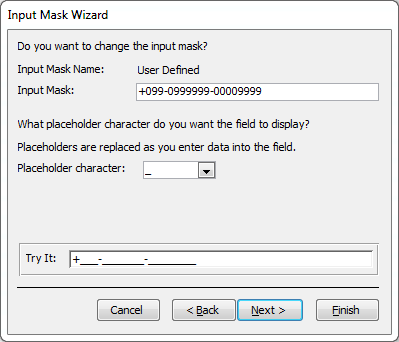
In this example we will create an input mask for a phone number in international format. The international format for phone numbers is
+<country code>-<area code>-<subscriber code>
- The country code can contain one, two or three digits and is preceded by a + sign.
- The area code can contain any number of digits, but let's take 6 as a maximum
- The subscriber code can contain any number of digits as well, but lets take 8 as a maximum.
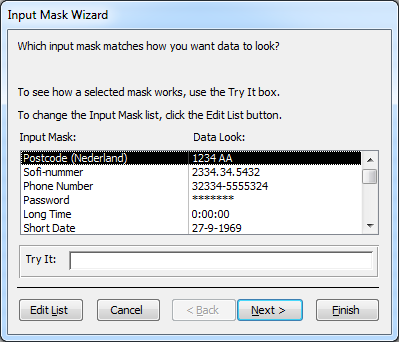
Follow these steps to create the input mask.
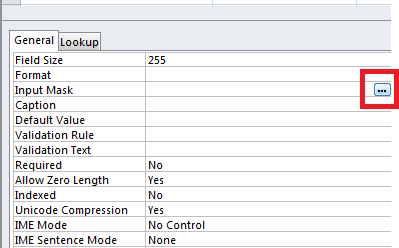
In the Input Mask field you can type an input mask directly if you know how to (and you will after reading the rest of this tutorial). If you don't yet know how to create an input mask yourself, click the small button that I marked with the red square. This will bring up the Input Mask Wizard.
You already saw that the 0 and 9 characters have a special meaning in an input mask. The table below shows all characters that have a special meaning in input masks.
| 0 | User must enter a digit |
| 9 | User can enter a digit |
| # | User can enter a digit, space, plus or minus sign. If skipped, Access enters a blank space. |
| L | User must enter a letter |
| ? | User can enter a letter |
| A | User must enter a letter or digit |
| a | User can enter a letter or digit |
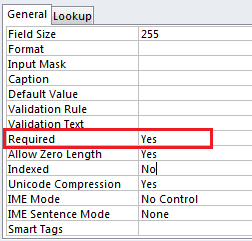
When you create tables in Access you should be strict about what data your fields can contain, because the consistency of your data determines how well you'll be able to retrieve and group data later on. One important job in doing this is telling Access whether your fields require a value and what happens if no value is supplied.
If you have a Customer table in your database you want to be sure your customers get names, so you know what to call them when you send them a letter. And you might want to be sure you have their email addresses, so you can send them an email. If you want to be sure a field gets a value, you set the Required property to "Yes" in Access.
It's good to be strict and require a value when you know you are going to need it later. But don't overdo it. You wouldn't want to require a middle name for every customer, for example.
You can set a default value for Number, Text, Memo, Date, Hyperlink, Currency and Yes/No fields. When you set a default value for a field, Access will automatically enter this value when no value is supplied for the field. You can set a default value in the same place where you set the Required property.
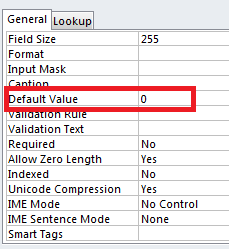
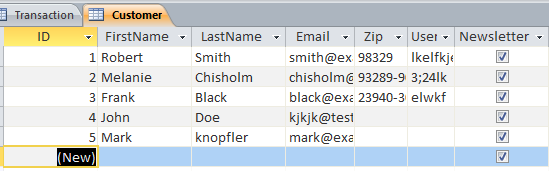
You should use default values when a field must have a value, but you don't want to force the database user to provide a value. In a Customer table you might have a Yes/No field that indicates whether the user wants to receive your monthly newsletter. You could set the default value of 1 or "Yes" (without quotes).
Every new record than automatically gets a "Yes" value for the Newsletter field, unless something else (in this case "No") is provided.
The real power of a relational database is in the ability to quickly retrieve and analyze your data by running a query. Queries allow you to pull information from one or more tables based on a set of search conditions you define.
In this lesson, you will learn how to create a simple one-table query. Then you will learn how to plan and run a slightly more complex multi-table query.
Queries are a way of searching for and compiling data from one or more tables. Running a query is like asking a detailed question of your database. When you build a query in Access, you are defining specific search conditions to find exactly the data you want.
Queries are far more powerful than the simple searches or filters you might use to find data within a table. This is because queries can draw their information from multiple tables. For example, while you could use a search in the customers table to find the name of one customer at your business or a filter on the orders table to view only orders placed within the past week, neither of those would let you view both customers and orders at once. However, you could easily run a query to find the name and phone number of every customer who's made a purchase within the past week. A well-designed query can give information that you might not be able to find out just by examining the data in your tables.
When you run a query, the results are presented to you in a table, but when you design one, you use a very different view. This is called Query Design view, and it lets you see how your query is put together.
Let's familiarize ourselves with the query-building process by building the simplest query possible: a one-table query.
We will run a query on the Customers table of our bakery database. Imagine that our bakery is having a special event, and we want to invite our customers who live nearby, since they are the most likely to come. This means we need to see a list of all the customers who live close by, and only those customers.
If you think this sounds a little like applying a filter, you're right. A one-table query is actually just an advanced filter applied to a table.
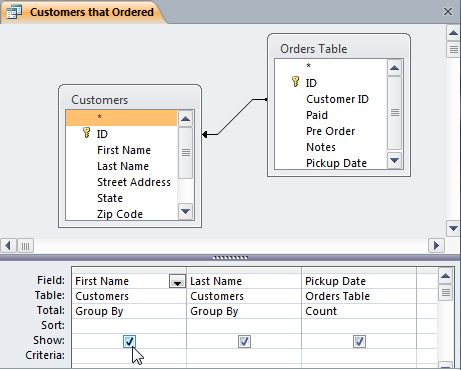
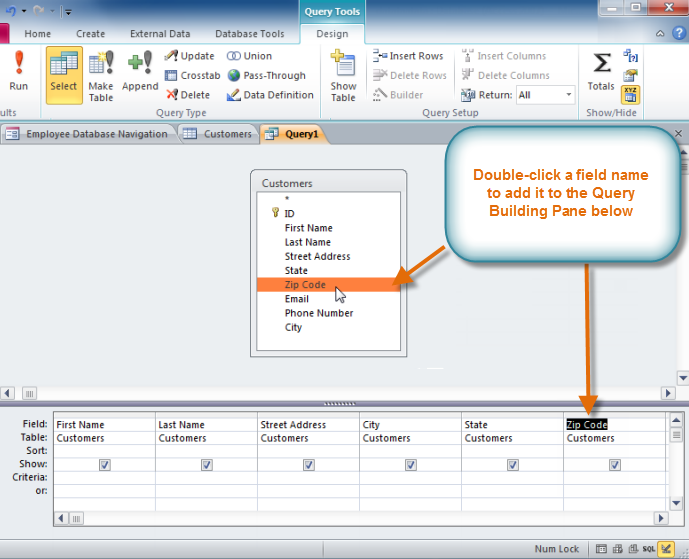
The selected table will appear as a small window in the Object Relationship Pane. In the table window, double-click the field names you would like to include in your query. They will be added to the Design Grid in the bottom part of the screen.
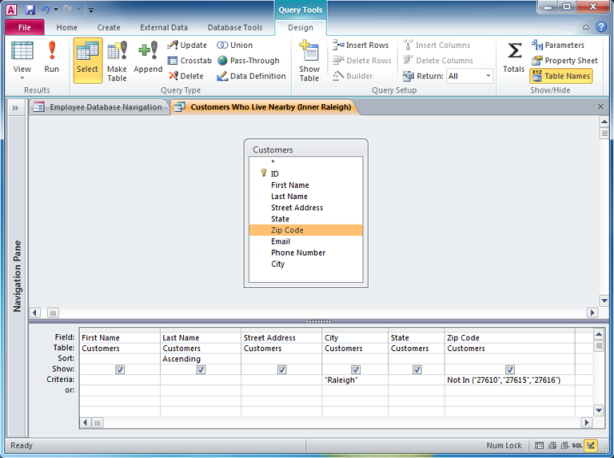
In our example, we want to mail invitations to customers who live in a certain area, so we'll include the first and last name, street address, city, state, and zip code fields. We aren't planning on calling or emailing our customers, so we don't have to include the telephone or email fields.
Set the search criteria by clicking on the cell in the Criteria: row of each field you would like to filter. Typing criteria into more than one field in the Criteria: row will set your query to include only results that meet all the criteria. If you want to set multiple criteria, but don't need the records shown in your results to meet them all, type the first criteria in the Criteria: row and additional criteria in the Or: row and the rows beneath it.
For this one-table query, we'll use very simple search criteria.
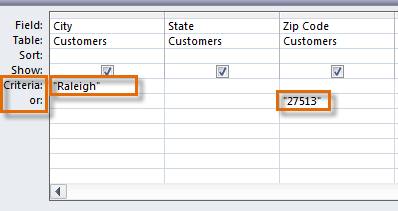
Setting the search criteria so that the query will find records with either "Raleigh" in the City field or "27513" in the Zip Code field.
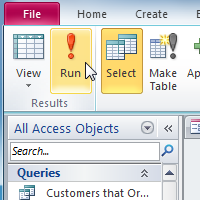
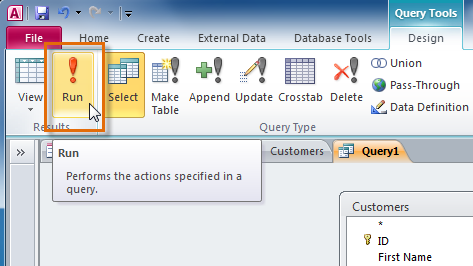
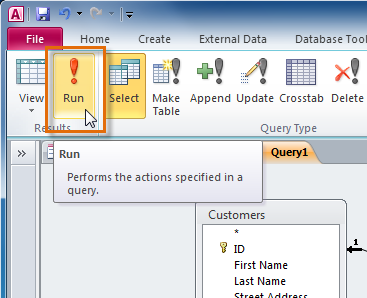
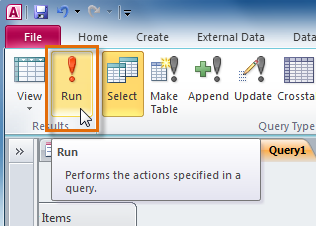
After you have set your criteria, run the query by clicking the Run command on the Query Tools Design tab.
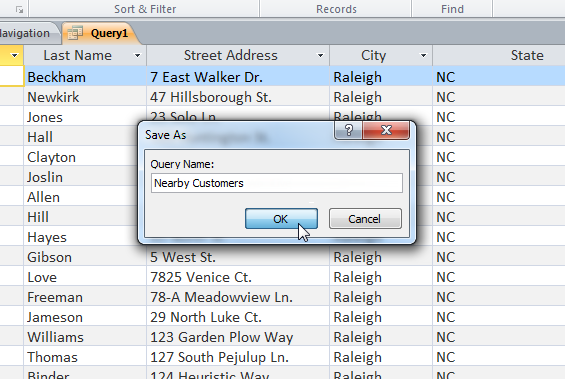
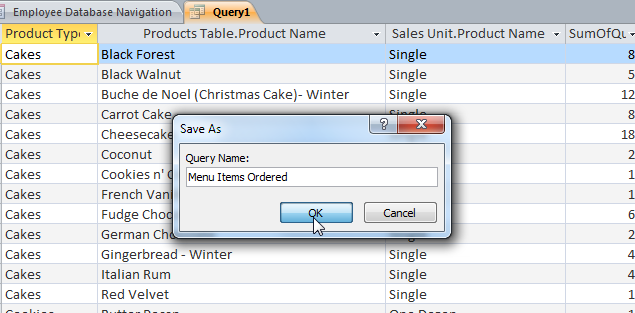
The query results will be displayed in the query's Datasheet View, which looks like a table. If desired, save your query by clicking the Save command in the Quick Access Toolbar. When prompted to name it, type in the desired name and click OK.
After you have set your criteria, run the query by clicking the Run command on the Query Tools Design tab.
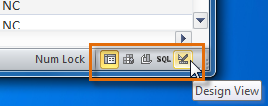
When you open an existing query in Access, it is displayed in Datasheet View, meaning that you will see your query results in a table. To modify your query, you must enter Design View, the view you used when creating it. There are two ways to switch to Design View:

In the bottom-right corner of your Access window, locate the small view icons. Click the Design View icon, which is the icon farthest to the right.
Once in Design View, make the desired changes, then select the Run command to view your updated results.
Access allows you to apply multiple sorts at once while you're designing your query. This allows you to view your data exactly the way you want, every single time you view it.
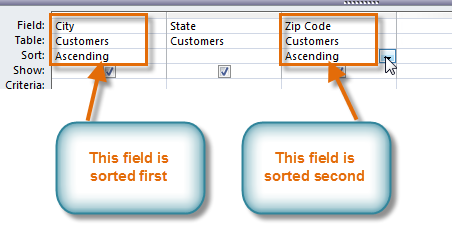
A sort that includes more than one sorted field is called a multi-level sort. A multi-level sort allows you to apply an initial sort, then further organize that data with additional sorts. For instance, if you had a table full of customers and their addresses, you might choose to first sort the records by city, then further sort them alphabetically by last name.
When more than one sort is included in a query, Access reads the sorts from left to right. This means that the leftmost sort will be applied first. So for instance, in the below example, the customers will be sorted first by the City they live in and then by the Zip Code within that city.
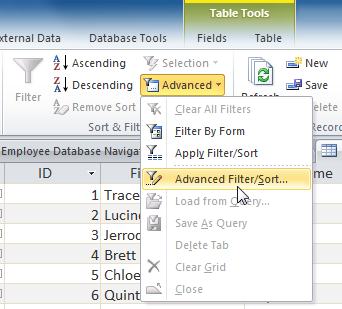
You can also apply multi-level sorts to tables that don't have queries applied to them. On the Home tab on the Ribbon, select the Advanced drop-down command in the Sort & Filter group. Select Advanced Filter/Sort, and create the multi-level sort as you normally would. When you're finished, click the Toggle Filter command to apply your sort.
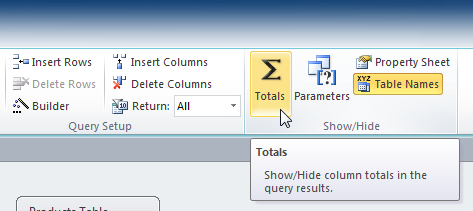
Sometimes, setting simple criteria won't give you the results you need, especially when you're working with numbers. You may want to see your query results grouped or counted in some way. Access 2010 offers several options that make these functions po ssible. Perhaps the easiest of these is the Totals command.
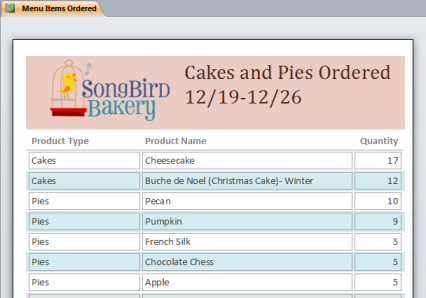
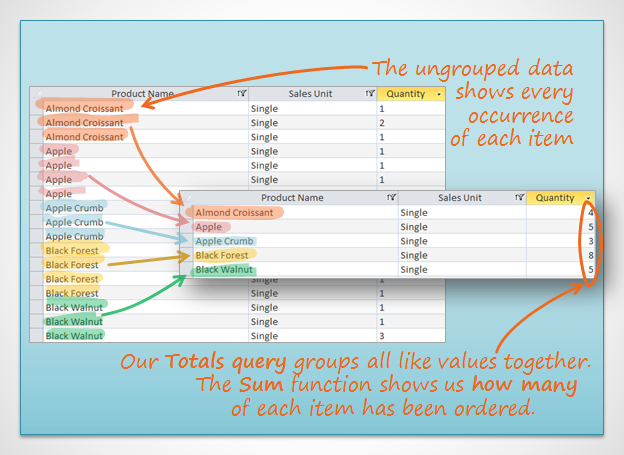
When you use the Totals function in your query, the data in your fields will be grouped by value, meaning that all items of one type are listed together. For instance, in a totals query about the items sold at our bakery, each type of item sold would be listed on a single row, no matter how many times that item had been sold.
Once your records are grouped, you can perform calculations with them. These calculations include:
These calculations will apply to the rows containing your grouped items. For example, if you decided to use Sum to find out how many of each item on a menu has been ordered, you would get a subtotal for each item in your query, not a grand total of all the items combined.
To add a calculation like a grand total to your query or table, review the instructions for creating a Totals row in our Modifying Tables lesson.
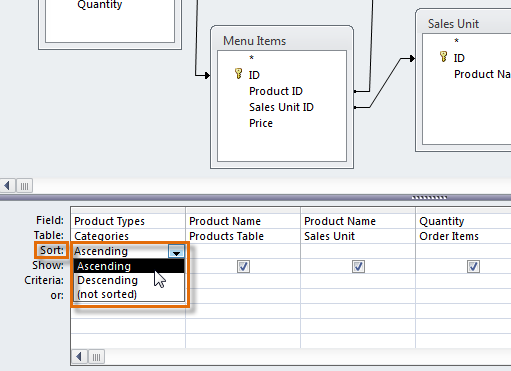
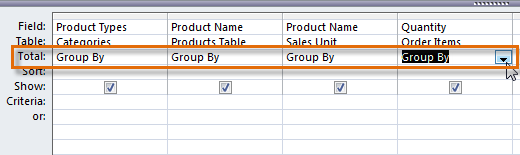
A row will be added to the table in the Design Grid, with all values in that row set to Group By. Select the cell in the Total: row of the field you would like to perform a calculation on, and click the drop-down arrow that appears.
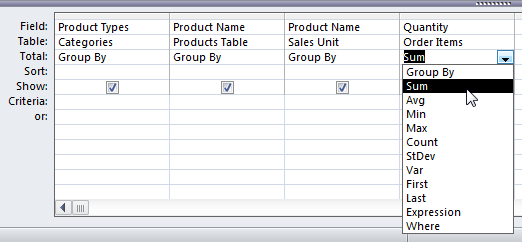
Select the calculation that you would like to be performed in that field. In our example, we want to add the quantities of products we've sold, so we'll select the Sum option.
When you are satisfied with your query design, select the Run command on the Query Tools Design tab to run the query.
The query results will be displayed in the query's Datasheet View, which looks like a table. If desired, save your query by clicking the Save command in the Quick Access Toolbar. When prompted to name it, type in the desired name and click OK.
An operator is a sign or symbol that specifies the type of calculation to perform within an expression. There are mathematical, comparison, logical, and reference operators. Access supports a variety of operators, including arithmetic operators such as +, -, multiply (*), and divide (/), in addition to comparison operators for comparing values, text operators for concatenating text, and logical operators for determining true or false values. This article provides details about using these operators.
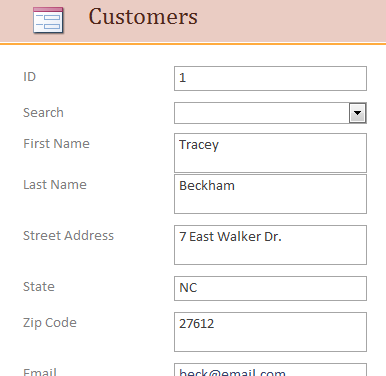
While you can always enter data directly into database tables, you might find it easier to use forms. Using a form to enter data lets you be certain that you're entering the right data in the right location and format. This can help keep your database accurate and consistent.
This lesson will address the benefits of using forms in a database. You will review examples of different forms and form components. Finally, you will learn how to use forms to enter new records and view and edit existing ones.
Many of us fill out forms so often that we hardly even notice when we're asked to use them. Forms are so popular because they're useful for both the person asking for the information and the person providing it. They are a way of requiring information in a specific format, which means the person filling out the form knows exactly which information to include and where to put it.
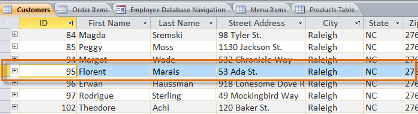
This is just as true of forms in Access. When you enter information into a form in Access, that data goes exactly where it's supposed to go-- into one or more related tables. While entering data into simple tables is fairly straightforward, data entry becomes more complicated as you start populating tables with records from elsewhere in the database. For instance, the orders table in a bakery's database might link to information about customers, products, and prices drawn from related tables. A record with information about a single order might look like this:

In fact, in order to see the entire order, you would also have to look at the order items table, where the menu items that make up each order are recorded.
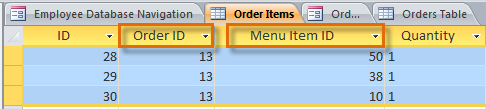
The records in these tables include ID numbers of records from other tables. You can't learn much just by glancing at these records, as the ID numbers don't tell you much about the data they relate to. Plus, since you have to look at two tables just to view one order, you might have a hard time even finding the right data. It's easy to see how viewing or entering many records this way could become a difficult and tedious task.
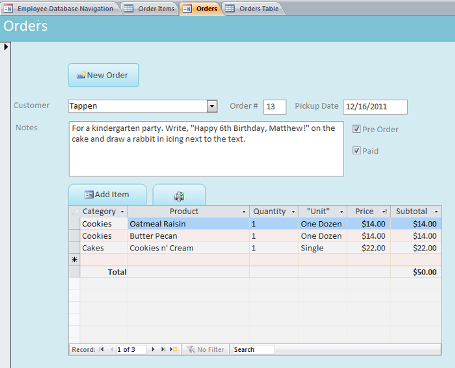
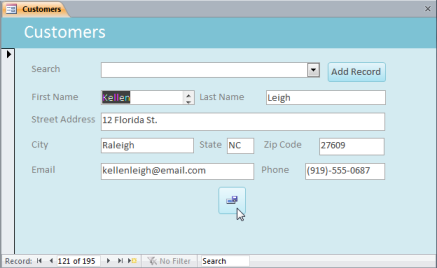
As you can see, this record is much easier to understand when viewed in a form. Modifying the record would be easier, too, since you wouldn't have to know any ID numbers to enter new data. When you're using a form, you don't have to worry about entering data into the right tables or in the right format-- the form can handle those things itself. There's no need to go back and forth between tables or search carefully within a table for a certain record, since forms let you see entire records one at a time.
Not only do forms make the data entry process easier for the user, they keep the database itself working smoothly. With forms, database designers can control exactly how users are able to interact with the database. They can even set restrictions on individual form components to ensure that all of the needed data is entered, and that it's all entered in a valid format. This is useful, as keeping the data consistent and well-organized is essential for an accurate and powerful database.
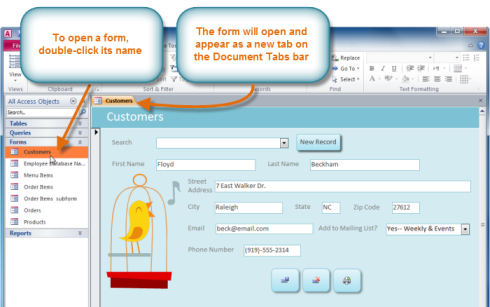
Depending on the database you're using, the forms you work with may include special tools and features that let you do common tasks with one click of a button. You'll see examples of these tools in the interactives on the next page. However, no matter what type of form you're working with, you can follow the same procedures for carrying out certain basic tasks.
There are two ways to add a new record to a form:

After creating a form, you might want to modify its appearance. Formatting your forms can help make your database look consistent and professional. Some formatting changes can even make your forms easier to use. With Access 2010's formatting tools, you can customize your forms to look exactly the way you want.
In this lesson, you will learn how to add command buttons, modify form layouts, add logos and other images, in addition to changing form colors and fonts.
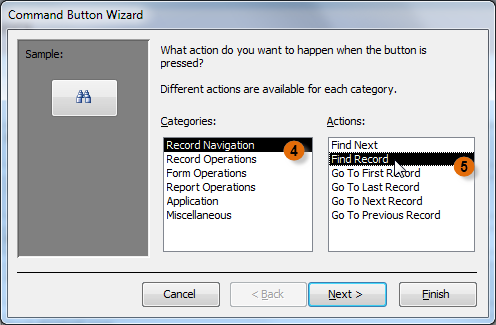
If you want to create a way for users of your form to quickly perform specific actions and tasks, consider adding command buttons. When you create a command button, you specify an action for it to carry out when clicked. By including commands for common tasks right in your form, you're making the form easier to use.
Access offers many different types of command buttons, but they can be divided into a few main categories, including:
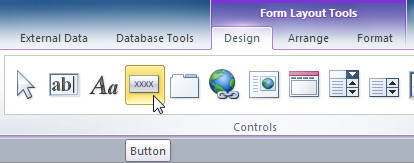
Your cursor will turn into a tiny crosshairs with a button icon  . Place it in the spot where you would like your command button to be, and click.
When you create a form, Access arranges the form components in a default layout where the fields are neatly stacked up on top of each other, all exactly the same width. While this layout is functional, you might find that it doesn't best fit your information. For instance, in the form below, most of the fields are almost completely empty, since the data stored there doesn't take up much room.
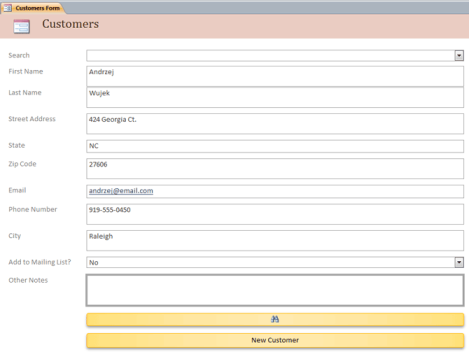
The form would fit the data a little better if we made the fields and command buttons smaller, and even put some of them side by side. However, with the default layout, you won't be able to put two fields next to each other or resize one field or button without resizing them all. This is because Access lines up form components in rows and columns. When you resize a field, you're really resizing the column that contains it.
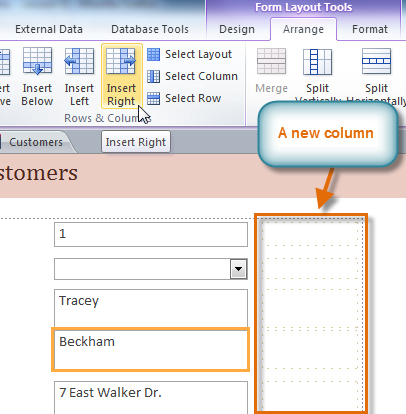
To resize and rearrange our fields the way we want, we'll have to modify the form layout. For instance, since the default layout for our form contains only two columns—one for the field labels and another for the fields—we would have to create a new column to put two fields side by side.
We can do this using the command on the Arrange tab, which contains all the tools you need to customize your form's layout.

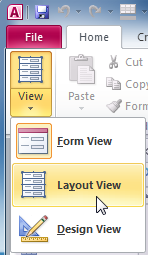
Switch to Layout view.
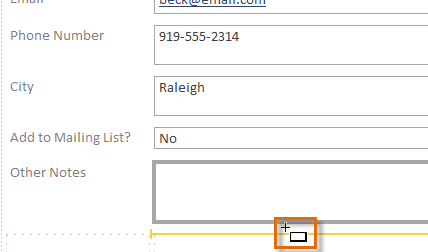
Select the field or button you would like to resize, and hover your mouse over the edge. Your cursor will become a double-sided arrow
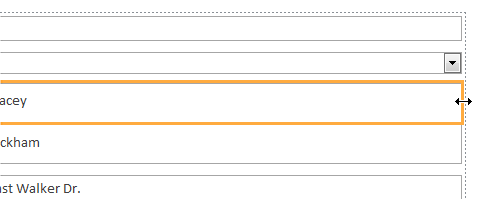
Click and drag the edge to resize, and release when the field or button is the desired size.

The field or button, as well as every other item in line with it, will be resized.
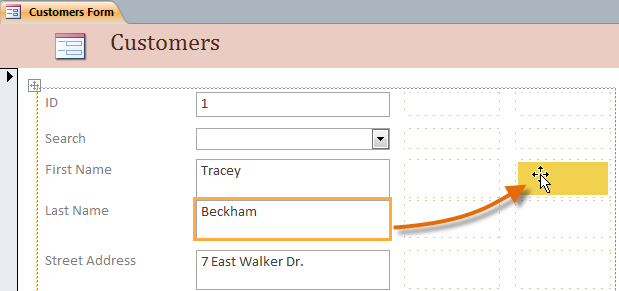
Click and drag the field or button to its new location. If you're moving a field, make sure to move the field label, as well.
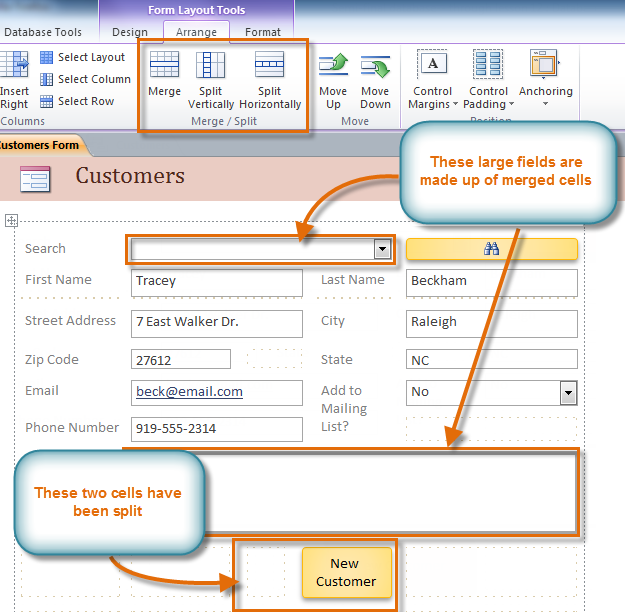
If you would like to make a field take up more or less space than one column, you can use the Merge and Split commands. The Merge command combines two or more cells, while the Split command divides a cell.
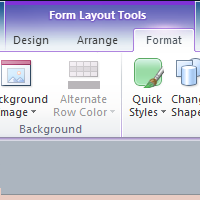
Adding logos and other images to your forms can greatly improve their appearance, as can applying theme colors and fonts. To learn how to add images and theme elements to your forms, review our instructions for Formatting Reports in our Advanced Report Options lesson. The procedures are identical.

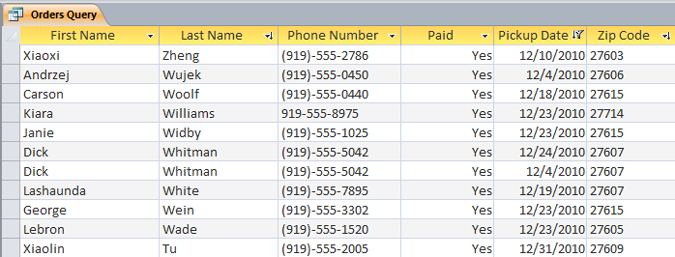
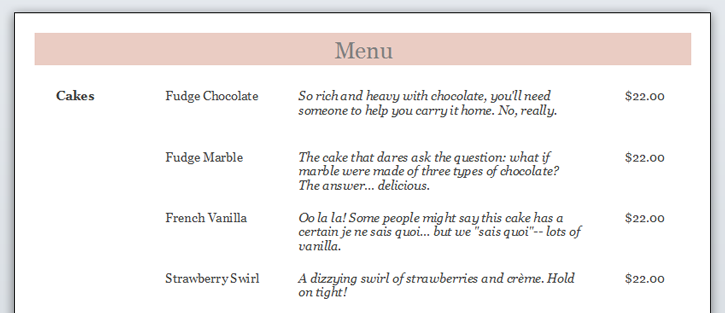
If you need to share information from your database with someone, but don't want them actually working with your database, you should consider creating a Report. Reports allow you to organize and present your data in a reader-friendly, visually appealing format. Access 2010 makes it easy to create and customize a report using data from any query or table in your database.
Reports give you the ability to present components of your database in an easy-to-read, printable format. Access 2010 lets you create reports from both tables and queries.
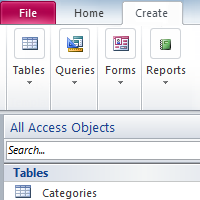
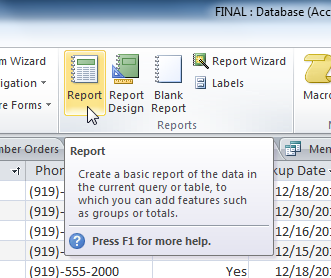
Select the Create tab on the Ribbon and locate the Reports group. Click the Report command.
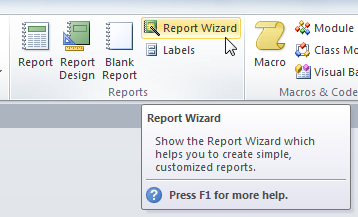
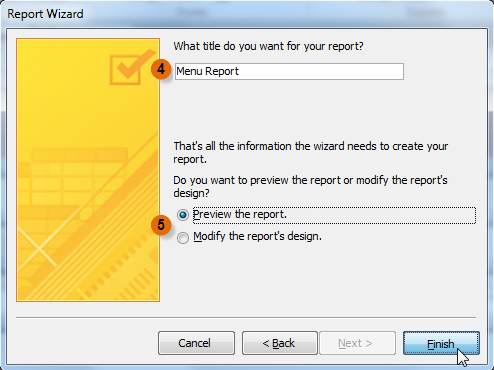
Access 2010 offers several advanced options for creating and modifying reports. The Report Wizard is a tool that guides you through the process of creating complex reports. Once you've created a report, whether through the Report Wizard or the Report command, you can then format it to make it look exactly how you want.
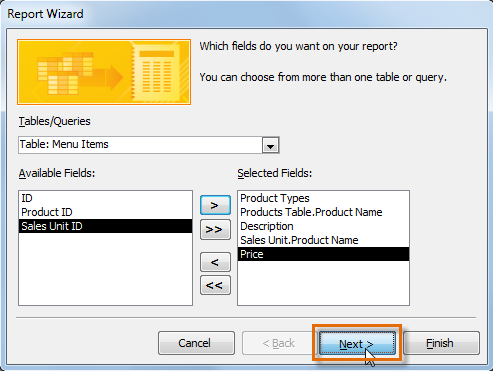
While using the Report command is a quick way to create reports from the current object, it's not as helpful if you want to create a report with data from multiple objects. The Report Wizard makes it easy to create reports using fields from multiple tables or queries. It even lets you choose how your data will be organized.
The Report Wizard dialog box will appear.
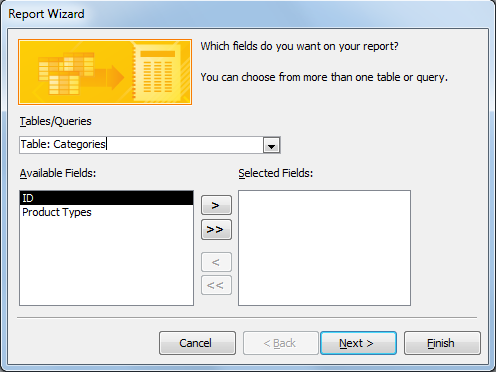
Select a field from the list on the left and click the right arrow to add it to the report.
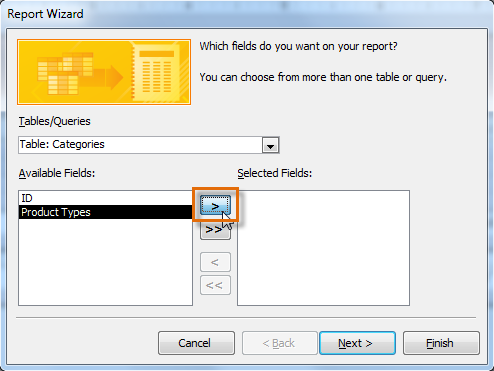
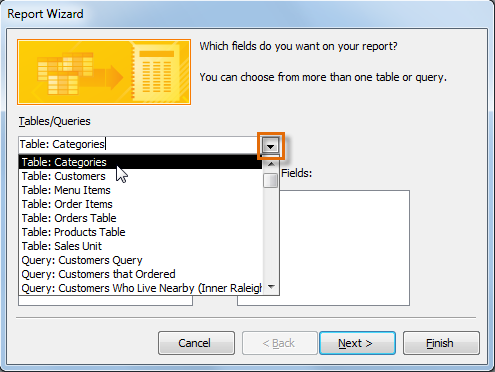
You can add fields from more than one table or query by repeating the above steps. Once you've added the desired fields, click Next.
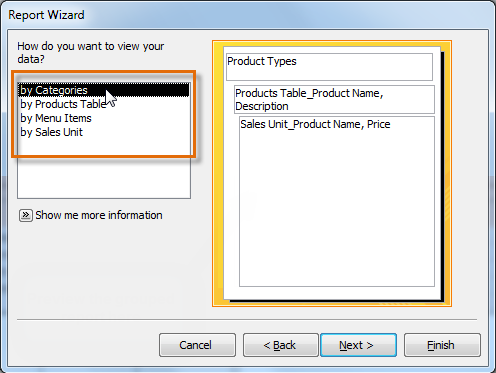
The Report Wizard will provide you with options that let you choose how to view and organize your data. These options group like data within your fields and organize those fields into multiple levels, like in an outline or bulleted list.
If you are building a report from only one table or query, you can skip to #3 in this section.
 to add it as a new level.
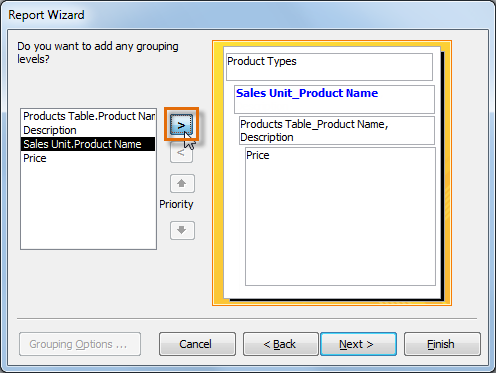
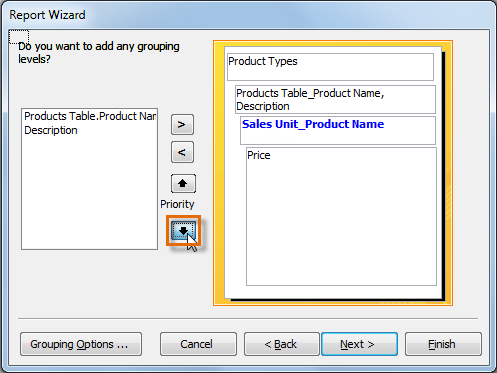
If necessary, modify the order of your grouped fields by selecting a field and clicking the up or down Priority arrow to move it up or down a level.

Depending on the grouping you have chosen for your data, your sorting options may be limited.
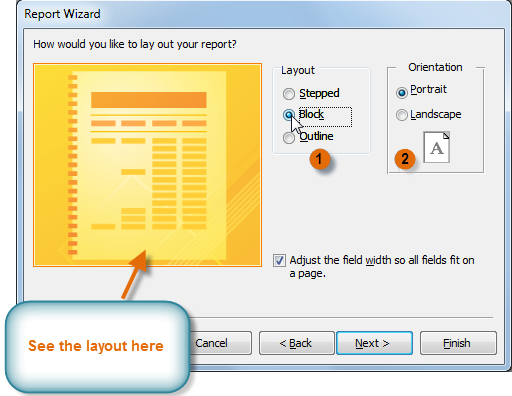
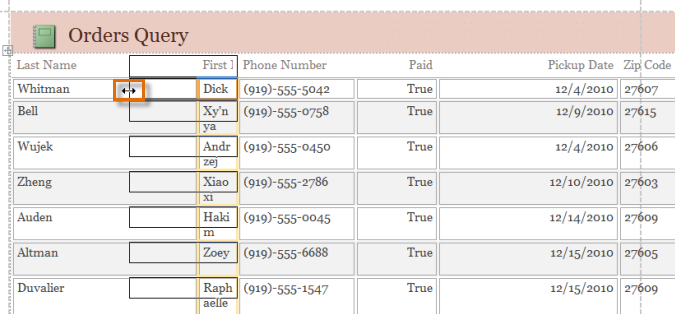
Just as with other reports, you may have to adjust your field and row size and location to make sure that all your data fits the way you want it to.
One of the strengths of reports is that you can modify their appearance to make them look how you want. You can add headers and footers to your report, apply new colors to the layout, and even add a logo. All of these things can help you create visually appealing reports.
The bulk of the information in your report comes straight from the query or table you built it from, which means you can't edit it within the report. However, you can change, add, or delete label text, headers, and footers to make your report clearer and easier to read. For example, in our report, we decided that we didn't need the field headings to understand our data, so we simply deleted them.
When working with text and text boxes in reports, you can use many of the text and shape formatting tools you use in other Office programs to modify color, font, and more.
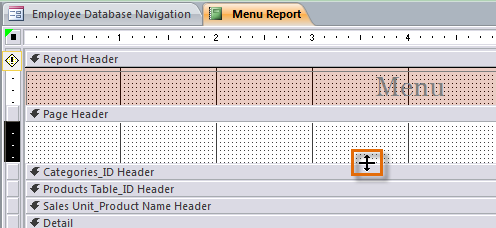
To view and modify the header and footer that appear on every page of your report, select the View command on the Ribbon and switch to Design View. The header and footer are located in the white space beneath the Page Header and Page Footer bars.
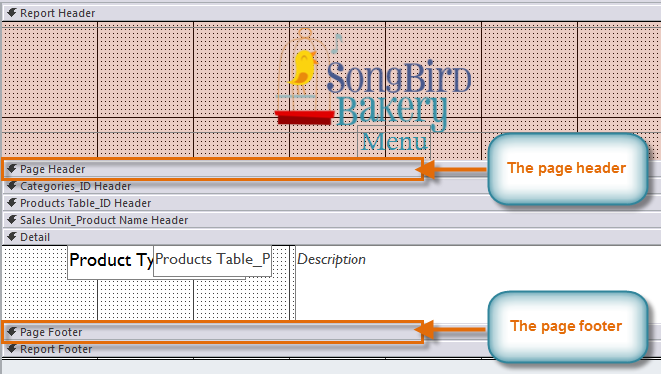
Depending on your report's design, sometimes you may find that there is no white space in the page header and footer, as in the image above. If this is the case, you must resize the header and footer before you can add anything to them. Simply click and drag the bottom border of the header or footer to make it larger.
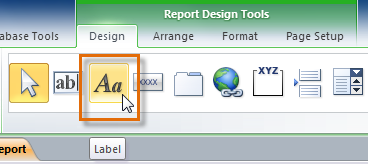
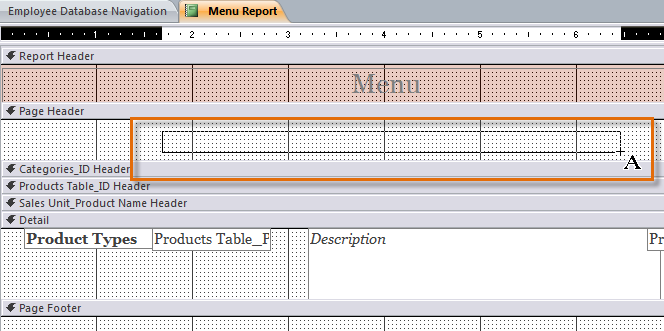
Place your cursor in the white space in your header or footer, and click and drag to create your label. Release the mouse when it is the desired size.
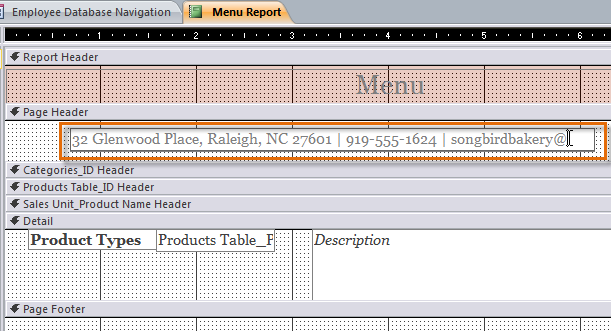
Place your cursor in the text box, click once, and type the desired text.
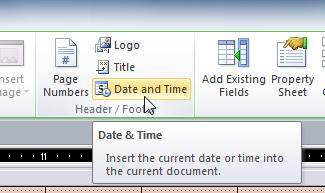
The Date and Time dialog box will appear. Select the desired formatting options. A preview of the text that will be included in your report will appear. When you are satisfied with the appearance of the date and time, click OK.
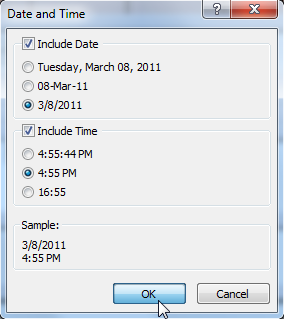
By default, the date and time appear in the header. If you would like to move them to the footer instead, simply click the date and time boxes and drag them to the desired location.
When you are satisfied with the settings, click OK.